
How Home EV Charger Installation Actually Works
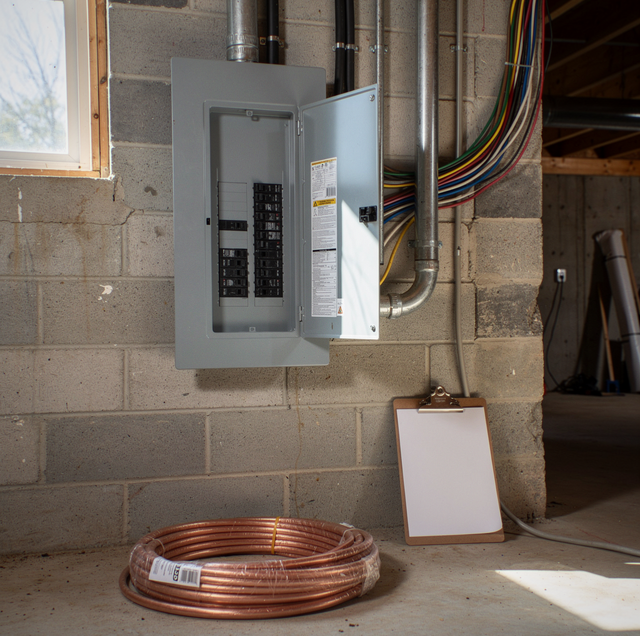
The charger shows up in a box a few days after the car does. It looks simple enough: a cable, a wall unit, a plug. Then you look at the panel in the garage or basement, count the open breaker slots, and realize this isn't a project you're plugging into an outlet the same way you would a space heater.
A home EV charger draws more continuous current than almost anything else in the house, and that changes what has to happen before it's ever mounted on the wall. Here's what actually goes into installing one, and why the process looks different depending on what's already behind your electrical panel.
Level 1 Versus Level 2 Comes Down to How Much Circuit It Needs
Every EV comes with a Level 1 cord that plugs into a standard 120-volt outlet, the same kind that powers a lamp. It works, but it's slow, often adding only 3 to 5 miles of range per hour of charging. Most owners outgrow it within the first few weeks and move to a Level 2 charger, which runs on a 240-volt circuit and can add 20 to 40 miles of range per hour, depending on the charger's output and the vehicle's onboard charger.
That jump from 120 volts to 240 volts is the whole reason a Level 2 charger isn't a plug-and-play appliance. It needs its own dedicated circuit, sized specifically for the charger's continuous draw, run directly from the panel rather than shared with anything else in the house.
Load Calculation Comes Before Any Wire Gets Pulled
Before touching a breaker, an electrician runs a load calculation on the panel: adding up what the house already draws (HVAC, water heater, range, dryer, and everything else on a major circuit) and checking how much capacity is left for a charger that can pull 30 to 48 amps continuously for hours at a stretch.
This step catches problems long before installation day. A 100-amp panel in an older home that already runs a heat pump, an electric range, and a dryer may have little room left for a 40-amp EV circuit without something else changing. A 200-amp panel with a lighter overall load usually has plenty of headroom. The load calculation determines whether the job is a simple circuit addition or requires a panel upgrade first.
The Breaker and Wire Gauge Are Matched to the Charger's Rating
Most Level 2 home chargers are rated between 32 and 48 amps, and because EV charging counts as a continuous load under standard electrical practice, the circuit has to be sized at 125% of that draw. A 40-amp charger, for example, typically needs a 50-amp breaker and wiring rated to carry it, usually 6-gauge copper for that range, run in its own conduit or cable back to the panel.
Undersizing this circuit is one of the more common shortcuts in a DIY or bargain install, and it's also one of the more dangerous. A wire that's too thin for the sustained current heats up during hours of charging, and repeated heat cycling like that degrades insulation and connections over time. This is the part of the job where matching the breaker, the wire gauge, and the charger's actual amperage rating matters more than almost anything else in the installation.
Hardwired Versus Plug-In Changes What's Mounted at the Wall
Some Level 2 chargers connect to a NEMA 14-50 outlet, similar in shape to the one a large electric range uses, allowing the charger to be unplugged and moved if needed. Others are hardwired directly into the circuit with no outlet at all, wired straight into a junction box behind the unit.
Hardwired installs tend to hold up better outdoors or in a garage that sees temperature swings, since there's no plug connection that can loosen or corrode over years of use. A plug-in setup offers more flexibility if you might swap chargers or move the unit later. Which one makes sense depends more on where the charger will live and how it'll be used than on any real difference in charging speed.
Where the Charger Sits Determines How the Circuit Gets Routed
A charger mounted a few feet from the panel is a short, simple run. One mounted at the far end of a detached garage, or in a driveway spot away from the house, means routing conduit through walls, along framing, or underground, depending on the layout.
An outdoor or garage-adjacent charger also requires weatherproofing considerations that an indoor circuit doesn't: a GFCI-protected circuit (most Level 2 EVSE units include this protection built in), a weather-resistant enclosure if it's mounted outside, and conduit rated for wet or below-grade locations if the run goes underground. None of this is optional add-on work. It's part of what makes the installation match the conditions the charger will actually sit in.
A Panel Upgrade Sometimes Has to Happen First
When the load calculation shows the existing panel doesn't have room for a dedicated 40- or 50-amp EV circuit alongside everything else already running, the fix isn't to undersize the new circuit. It's to increase the panel's capacity, either with a larger main panel or, in some cases, a load management device that shares capacity between the EV circuit and other high-draw appliances so nothing gets overloaded.
This is more common in older homes running a 100-amp panel that was adequate decades ago but is now asked to support central air, an electric water heater, and a car charger on top of everyday circuits. It's worth knowing going in that the charger itself might be the easy part of the job, and the panel is what actually decides the timeline.
Permits and Inspection Aren't a Formality
A dedicated 240-volt circuit at this amperage is inspected work in most jurisdictions, not a job that gets signed off informally. An electrician pulls the permit; the inspector checks the breaker sizing, wire gauge, grounding, and disconnect access, and the record is filed with the jurisdiction. That inspection record matters later, too. It's part of what an insurer or a home buyer's inspector looks for if the property is ever sold or a claim is ever filed involving that circuit.
Weighing All of This Before the Charger Goes On the Wall
The charger itself is the easy part; it's largely the same box no matter whose garage it ends up in. What actually varies from house to house is what's behind the wall: how much room the panel has left, how far the circuit has to travel, and whether the mounting location needs extra weatherproofing. An electrician sorts all of that out with a load calculation and a look at the panel before a single breaker gets installed, and that groundwork is what determines whether your install is an afternoon job or one that starts with a panel upgrade.
Frequently Asked Questions
A basic install with an existing panel that has capacity usually takes an electrician two to four hours, mostly running the dedicated circuit and mounting the unit. A job that also needs a subpanel or additional circuit routing through finished walls takes longer.
Not on a single dedicated circuit built for one charger. Charging two vehicles usually means either two separate circuits or a single charger with dual connectors that alternates or splits capacity between them, which needs to be accounted for in the original load calculation rather than added later.
Electricians typically install a readily accessible disconnect near a hardwired charger, separate from the panel breaker, so the circuit can be shut off at the unit itself during service. Inspectors generally look for this as part of the installation, not something added after the fact.
Nothing changes about it. The new circuit is entirely separate wiring back to its own breaker, so an existing outlet in the garage keeps working exactly as it did before, unrelated to the new charging circuit.
It can, if the panel is already near capacity. That's exactly what the load calculation checks for before installation, since a 40-amp charger running for hours, overlapping with, say, an electric dryer and central air, can push a marginal panel past what it was designed to carry. Some Level 2 chargers solve this with built-in load management: the charger talks to a current sensor on the main feed and automatically throttles its own amperage down when the dryer or AC compressor kicks on, then ramps back up once that demand drops, which can let a marginal panel support a charger it otherwise couldn't handle at full output.
An outdoor charger faces more temperature swings and moisture exposure, which is why the enclosure rating and the conduit used for that run matter more than they would for an indoor install. When properly installed with weather-rated components, an outdoor charger holds up well, but it's not the same as an installation bolted to a garage wall. One thing that catches people off guard: many units also throttle their charging output once their internal electronics get too hot, so a charger mounted in full afternoon sun can charge noticeably slower on a scorching day than the same model tucked in shade, even with nothing wrong with the wiring.
If your panel or parking situation makes installing an EV charger feel more complicated than it should be, have someone look at both before you buy the unit.
Schedule an EV charger installation assessment — an electrician will check your panel capacity and circuit routing before any equipment goes on the wall. Wired Up Electrical serves Lynchburg, Forest, and Bedford. Call (434) 254-1264.
